 Defender 110 Dashboard Removal |
|
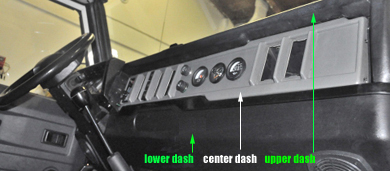
Removing the dash in a NAS 93 Defender 110 can be a relatively easy task if you know what to do. If you don't, you can end up with much more damage than when you started. Proceed with caution and at your own risk. If this is a daily driver for you, then start the project on a weekend since driving with the dash wide open is not as simple as it looks. White arrows indicated necessary steps. Green arrows indicate optional steps.
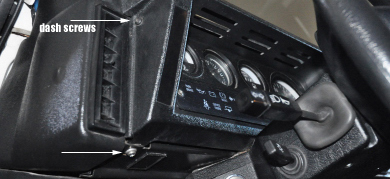
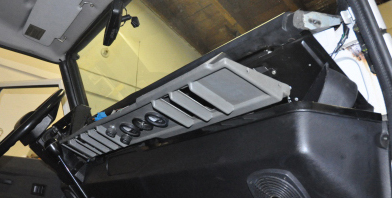
Here's what the stock NAS 93 Defender 110 dashboard looks like (above).
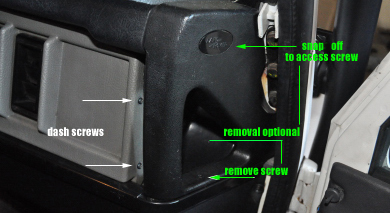
Start by removing the necessary dash screws (white arrows).
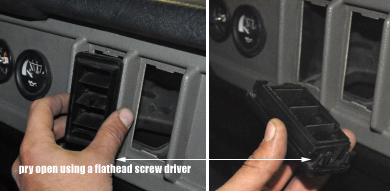
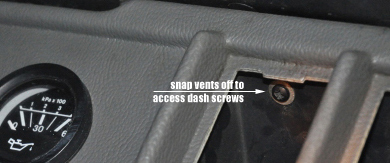
Pry open vents to access dash screws behind them.
Not all vents have a hidden dash screw behind them. Only three do.
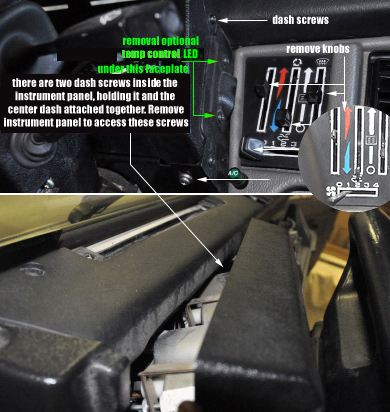
Remove all four instrument panel screws to open the panel.
Once the four instrument panel screws have been removed, gently pry open the panel. There is no need to disconnect and remove the panel so long as you pry it open as far as you can to fit a screw driver and your hand to unscrew the last two hidden dash screws. These screws are hard to reach, so the instrument panel must be opened in order to reach them. Proceed with caution. Using excessive force to pry open the panel can damage instruments and wires inside. |
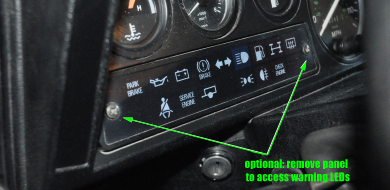
Remove the warning indicator panel if you plan to replace any LEDs. Otherwise, this step is optional.
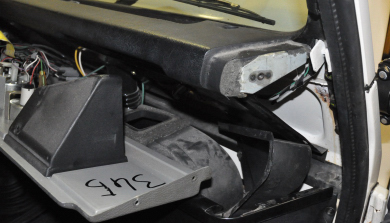
Use gentle force and a flathead screw driver to pry open the dash now that all dash-holding screws have been removed. The center dash tends to feel like it is breaking as you gently force it open. Proceed with caution and the dash should snap off after a few tries.
If you don't need to completely remove the dash, then it is okay to leave it hanging. However, due diligence is required to make sure no connectors or wires will be damaged by doing so.
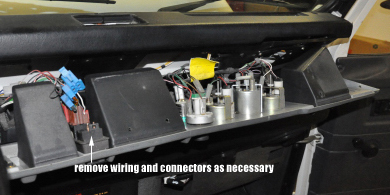
Disconnect a few connectors to allow for a comfortable hang. DO NOT subject cables, wires, and connectors to high tension. Otherwise, you may end up damaging something.
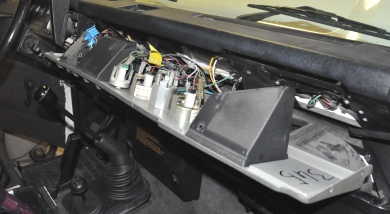
The dash is wide open and ready to access gauges, switches, and the temp control box. Accessing the temp control box on a Right-Hand Driver Defender is a far easier task than on a Left-Hand Driver since the temp control box is a separate segment of the dash by itself and can be removed without having to remove the entire dash.
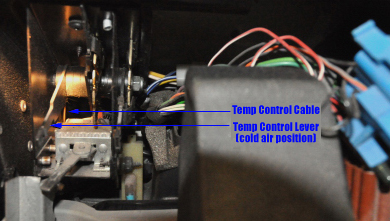
Note: If you plan to replace the temp control cable going through the bulkhead, you will also need to remove the lower dash. Whatever your purpose may be, try to take some digital pictures as you disassemble things. It's a life saver when you need a point of reference. If you need parts and cannot find them locally, visit RoversNorth, your authorized and official North American Defender 110 parts distributor. They have some good guys on staff that know a whole lot about Defenders and always seem eager to help. |
|
Table of Contents • DefenderHelp.com is an
independently owned and operated web
site intended to help Defender 110
owners and is not associated
with any manufacturer, vendor, or
commercial entity unless otherwise
mentioned clearly. We do not
endorse vendors or products unless we
test them, use them, like them, and
find sharing the information
beneficial to other Defender 110
owners. Visitors may view
and use this web site at their own
risk. All information and content here
is provided for free. All rights
reserved. Copyright DefenderHelp.com
|