 Defender 110 Temperature Control Cable Fix & DIY Fabrication |
|
A common problem with the NAS 93 Defenders is that after years of use and being subjected to all weather, the temperature control cable fixture starts wearing out and the cable starts to rust within its rubber sleeve. This affects movement at the AC/Heater Unit (refer to Air Conditioning System for more information) in the engine compartment and limits the range of, or altogether disables, the movement of the lever inside the vehicle. In this scenario, the cable fixture that attaches the cable to the control lever broke off, so I began looking for a replacement fixture/part. Unfortunately, I could only find an updated version of the fixture that fit the RHD version Defender. Everything about the RHD version looks different when looking closely at diagrams. So I decided to reconnect using a DIY fabricated fixture, a new improved version of the original fixture.
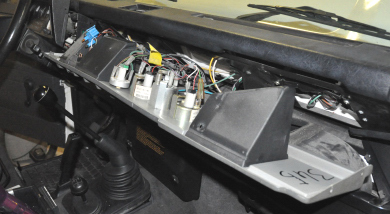
First, remove the center dash. If you don't know how, visit the Defender Dash Removal page. Once the dash is opened or removed, you are ready to access the temp control box. Accessing the temp control box on a Right-Hand Driver Defender is a far easier task than stock NAS 93 model Defenders. The RHD version of the temp control box is a separate segment of the dash by itself and can be removed without having to remove the entire dash.
With the dash removed, locate the disconnected cable at the inside-end of the temperature control lever. You will see a copper looking (rusted metal in actuality) wire sticking out by itself. Usually when the fixture connecting this cable to the control level snaps, it falls right into the lower dash. And when that happens one either has to A, remove the lower dash to remove the broken piece, B, let it be and order replacement fixture, or C, fabricate an improved version of the fixture DIY-style.
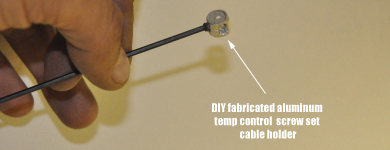
I decided to fabricate a set-screw type adjustable fixture from T-6061 aluminum for the job. The best way to fabricate this is to look carefully at the length of cable remaining and, if broken, create and off-set fixture to compensate for the small reduction in cable length.
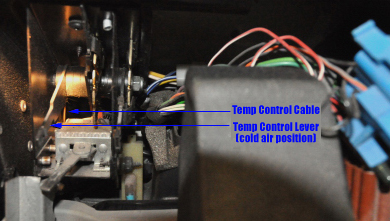
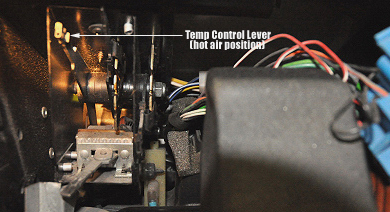
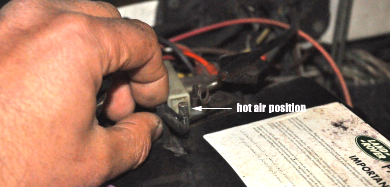
When installing the new fixture, the control lever is best positioned down (cold air position) and fitted into the fixture by gently moving the lever down to hot air position (shown above). Once the cable passes through the fixture and passes the set-screw, tighten the set-screw and check for lever range of movement. Adjust cable position by loosening and retightening the set-screw until the temp control lever range of movement is properly configured. Proceed with caution as work space is quite limited due to the design of the temp control area. If you drop a part it will most likely fall into the lower dash section right away. To retrieve the part, you will have to remove the entire lower dash--not a complicated task, but somewhat labor intensive. |
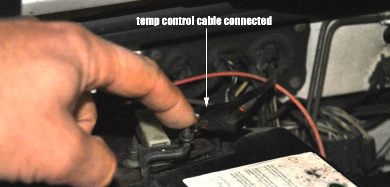
An easy fix and temporary solution to the "broken temp control cable" problem is to simply pop the hood, disconnect the temp control cable from the top of the AC/Heating unit inside the engine compartment. Once the cable is disconnected from the AC/Heating unit control lever, the lever may be positioned in heating or cooling position as desired. Basically, the temp control lever inside the vehicle is bypassed by adjusting the AC/Heating unit lever inside the engine compartment when needed.
Above you see the temp control cable attached to AC/Heating unit control lever.
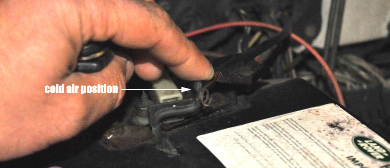
Above you see the temp control cable disconnected from the AC/Heating unit control lever. Once disconnected, everything works as expected and you have the full range of heating and cooling intended for the Defender. Note, however, that you will have disconnected the (non-functional) temp control lever inside cabin.
Pull the AC/Heating unit lever towards you and you will have full heat in the cabin. Push it away (above) and you will have cool air once the AC is turned on inside the cabin. You may have to open the hood only seasonally if you live on the east coast. But in southern California where the morning starts cold, warms by mid-day, and is cold again at night, accessing under the hood repeatedly to adjust cabin temperature can get old really fast. So consider this a quick fix and a temporary solution at best.
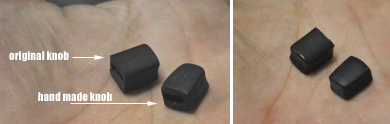
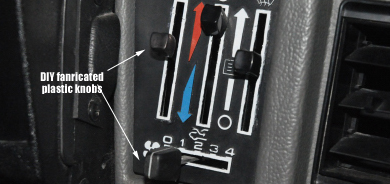
The inside cabin temp control plastic knobs are brittle and either crack and fall off occasionally or fall off and get lost. A small 1/2" x 1/2" block of acetal/hard plastic material (similar material to most kitchen cutting boards) will work perfectly for fabricating replacement knobs as needed. The more time spent in fabrications, the more accurate and aesthetically pleasing the end-product. Alternatively, you can order replacement knobs (get some extra while you're at it) from RoversNorth or visit an auto junkyard for something less.
In this case, I decided to fabricate my own parts simply because I had the materials and tools needed for the job, and I enjoy fabricating improved or replacement parts, time permitting. Choose what works best for you. |
|
Table of Contents • DefenderHelp.com is an
independently owned and operated web
site intended to help Defender 110
owners and is not associated
with any manufacturer, vendor, or
commercial entity unless otherwise
mentioned clearly. We do not
endorse vendors or products unless we
test them, use them, like them, and
find sharing the information
beneficial to other Defender 110
owners. Visitors may view
and use this web site at their own
risk. All information and content here
is provided for free. All rights
reserved. Copyright DefenderHelp.com
|